
How to Replace a Turntable Stylus: Complete Step-by-Step Guide for Beginners
Replacing your turntable stylus is one of the most important things you can do to keep your vinyl records sounding clear and crisp. If you notice your music sounds flat, fuzzy, or your records are skipping, it’s probably time to swap out the stylus. This guide explains how to replace a turntable stylus, step by step, with practical tips to make the process smooth and stress-free. You’ll also find product suggestions and advice to help you get the best results.
Why Replace Your Turntable Stylus?
Your stylus, often called the needle, is the tiny part of your turntable that actually touches the grooves in your records. Over time, the tip wears down. When it does, you’ll hear:
- Distorted or muffled sound
- Skipping, jumping, or repeating
- Hissing, crackling, or static
- Uneven stereo balance
- Damage to your records’ grooves
A worn stylus can even ruin your favorite records. Replacing it keeps your music sounding sharp and your vinyl collection safe.

When Should You Replace Your Stylus?
How long a stylus lasts depends on its shape, the materials used, and how often you play records. Here’s a general guide to stylus lifespans:
| Stylus Type | Estimated Lifespan (Hours) |
|---|---|
| Conical/Bonded Elliptical | 300-500 |
| Nude Elliptical | 500-800 |
| Shibata / Fine Line | 800-1,000+ |
If you listen to one record a day, you should plan to replace your stylus every 1-2 years. But don’t just go by the calendar—watch for these signs:
- Sound is dull, fuzzy, or distorted
- Records skip or repeat sections
- You see visible wear or a bent needle
- You hear more pops and clicks than usual
If you’re unsure, use a magnifying glass to inspect the tip. If it looks flat or chipped, it’s time for a new one.
What You Need Before You Start
Before you begin, gather these items:
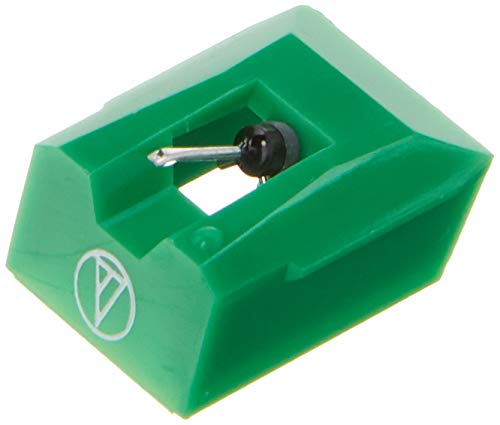
- A replacement stylus that matches your cartridge (check your turntable’s manual or look up your cartridge model; brands like Ortofon, Audio-Technica, and Grado are reliable and easy to find on Amazon)
- Clean hands or a pair of gloves
- A small flathead screwdriver (some stylus types may need this)
- A stylus brush or a soft, clean brush for dusting
It’s also smart to have a clean, well-lit workspace and a towel or mat to protect your turntable and records.
Step-by-Step Stylus Replacement Guide
1. Turn Off and Unplug the Turntable
Always start by turning off and unplugging your turntable. This protects you and your gear from accidental bumps or shocks.
2. Remove the Headshell (If Your Turntable Has One)
If your turntable has a removable headshell, twist the locking collar and gently pull the headshell off the tonearm. This makes it much easier to handle the cartridge and stylus.
If your headshell isn’t removable, don’t worry. You can still replace the stylus while it’s attached. Just be extra careful.

3. Handle the Stylus by the Sides, Not the Needle
The cantilever—the thin rod holding the needle—is delicate. Always handle the stylus by the plastic or metal sides. Never touch the needle tip or cantilever directly.
4. Remove the Old Stylus
- For most moving magnet cartridges, grip the stylus casing and gently pull it downward or forward.
- If it feels stuck, use a small flathead screwdriver to gently nudge it loose, but don’t force it.
- Some cartridges use a clip or latch. If so, gently release it before pulling the stylus free.
Set the old stylus aside in a safe place. If it’s still in decent shape, you can keep it as a backup.

5. Align and Install the New Stylus
- Take the new stylus out of its packaging. Avoid touching the needle tip.
- Line up the stylus with the cartridge body.
- Gently push it into place until it clicks or feels secure. Don’t use excessive force—if it doesn’t fit, double-check that you have the right model.


6. Reattach the Headshell (If You Removed It)
If you took off the headshell, reattach it to the tonearm and tighten the locking collar. Make sure it’s secure, but don’t overtighten.
7. Check and Adjust Your Setup
- Rebalance your tonearm if needed. This step is especially important if you changed to a different stylus type.
- Set the tracking force according to your cartridge’s specs. You’ll find this in the manual or online. A digital stylus force gauge can help.
- Double-check the anti-skate setting, which should usually match your tracking force.
8. Test with a Record
Pick a record you know well and play a track. Listen for clear sound, no distortion, and no skipping. If you hear problems, double-check the stylus alignment and tracking force.
Extra Tips for a Smooth Stylus Replacement
- Always use the stylus guard when you’re not playing records.
- Clean your stylus regularly with a soft brush, moving from back to front. Never brush side to side or front to back.
- If you notice any bending or damage, replace the stylus immediately.
- Buy replacement styli from trusted sellers. Stick to authorized dealers or top-rated Amazon listings to avoid counterfeits or used products.
- Keep your records clean. Dirt on your vinyl can wear down your stylus faster.

How to Find the Right Replacement Stylus
Not all styli fit all cartridges. Here’s how to make sure you get the right one:
- Check your cartridge model—this is usually printed on the cartridge itself or in your turntable’s manual.
- Search for replacement styli by cartridge model, not just by turntable brand.
- When in doubt, contact the cartridge manufacturer or check their website for compatibility info.
- Many popular stylus models are available on Amazon. Double-check the product description and reviews before buying.
Recommended Replacement Styli
Here are some well-known replacement stylus options that fit many popular cartridges:
- Audio-Technica ATN95E Replacement Stylus
Compatible with many Audio-Technica cartridges. Known for solid performance and value. - Ortofon 2M Red Stylus
A favorite for Ortofon cartridge owners. Offers clear, detailed sound. - Ortofon Stylus MK II Mix Replacement Stylus
Balanced, transparent sound. Fits Concorde MK II Mix cartridges.
Always confirm compatibility with your cartridge before ordering.


Common Stylus and Cartridge Types
Understanding your cartridge and stylus type helps you buy the right replacement.
- Moving Magnet (MM): Most common. Stylus is usually user-replaceable.
- Moving Coil (MC): Higher-end. Stylus is often not user-replaceable; the whole cartridge must be replaced.
- Conical, Elliptical, Shibata, MicroLine: These terms describe the shape of the stylus tip. Elliptical and advanced shapes track grooves more accurately and last longer.
Check your cartridge’s specs to know what you have.
How to Care for Your New Stylus
A new stylus is an investment. Here’s how to keep it in top shape:
- Use a stylus brush after every few records. Brush from back to front.
- Keep records clean with an anti-static brush or record cleaning solution.
- Always use the stylus guard when moving or dusting your turntable.
- Avoid playing dirty or damaged records.
- Don’t touch the stylus tip with your fingers.
Troubleshooting Stylus Replacement Issues
If you run into problems, here’s what to check:
- Distorted sound: Double-check stylus alignment and tracking force.
- Skipping or jumping: Make sure the stylus is fully seated and the tracking force is correct.
- No sound from one channel: Inspect the headshell wires for loose connections.
- Stylus won’t fit: Confirm you have the correct model for your cartridge.
If you’re still having trouble, consult your turntable’s manual or reach out to the cartridge manufacturer.
Frequently Asked Questions
Q: Can I upgrade my stylus for better sound?
A: Yes, many cartridges allow you to use a higher-end stylus for improved clarity and tracking. Check your cartridge’s compatibility.
Q: How do I know if my stylus is worn out?
A: Listen for distortion, skipping, or loss of detail. Inspect the tip for flat spots or chips.
Q: Should I replace the cartridge or just the stylus?
A: If your cartridge is in good shape, just replace the stylus. If the cartridge is old or damaged, consider replacing both.
Q: Can I use any stylus with any cartridge?
A: No, you need a stylus designed for your specific cartridge model.
Final Thoughts
Replacing your turntable stylus is a simple task that makes a big difference in sound quality and record longevity. Take your time, follow the steps, and handle the stylus gently. With the right replacement and a little care, your records will sound their best for years.


