
The Art of Vinyl Care: A Comprehensive Guide to Cleaning Your Records
In the age of digital streaming, vinyl records have made quite the comeback, attracting music enthusiasts with their distinctive sound and creating that tangible connection to the music. However, to really appreciate the full potential of your vinyl collection, proper maintenance is necessary. One of the most important aspects of vinyl care is keeping your records clean. In this comprehensive guide, we’ll walk you through the process of cleaning your records, ensuring they sound their best for years to come.
Why You Should Be Cleaning Your Records
Before we dive into the cleaning process, it’s essential to understand why keeping your records clean is so important:
- Improved Sound Quality: Dust, dirt, and debris in the grooves can cause distortion, pops, and crackles during playback. Clean records produce clearer, more detailed sound, allowing you to hear your music as it was intended.
- Extended Lifespan: Regular cleaning prevents the buildup of contaminants that can permanently damage the vinyl surface over time. This preservation ensures that your records will continue to play beautifully for years, even decades, to come.
- Stylus Protection: A clean record means less wear on your turntable’s stylus (needle). This not only prolongs the life of your stylus but also maintains its optimal performance, ensuring consistent sound quality across your entire collection.
- Preservation of Value: Well-maintained records retain their value better, which is especially important for rare or collectible albums. If you ever decide to sell or trade parts of your collection, clean records will command higher prices.
- Enhanced Listening Experience: There’s nothing quite like the ritual of putting on a record, dropping the needle, and hearing the music come to life. Clean records enhance this experience, allowing you to immerse yourself fully in the music without distractions from pops, crackles, or distortions.
Now that we understand the importance of clean records, let’s explore the different methods and tools you can use to keep your vinyl in top condition.
Essential Tools for Vinyl Cleaning
Before we begin the cleaning process, you’ll need to gather some essential tools:
- Carbon Fiber Brush: This is your first line of defense against dust and static electricity. It’s gentle enough for everyday use and effective at removing surface dust.
- Microfiber Cloths: Soft, lint-free cloths are essential for gentle cleaning and drying. Avoid using regular towels or rags, as they can leave fibers behind or scratch the vinyl surface.
- Record Cleaning Solution: Use a specialized solution designed for vinyl records. These solutions are formulated to clean effectively without damaging the vinyl or leaving residues. Avoid household cleaners or alcohol-based products, as these can cause long-term damage to your records.
- Distilled Water: Regular tap water can contain impurities that may damage your records. Always use distilled water for cleaning and rinsing to ensure the safest treatment for your vinyl.
- Soft-Bristled Brush: For deeper cleaning of the grooves, a soft-bristled brush designed specifically for record cleaning is invaluable. These brushes can reach into the grooves to remove stubborn dirt without causing damage.
- Record Cleaning Machine (optional): For more serious collectors or those with large collections, a vacuum-based cleaning machine can provide thorough cleaning with less manual effort.
- Anti-static Gun (optional): This tool helps neutralize static electricity on your records, which can attract dust and affect sound quality.
- Stylus Cleaning Kit: While not directly used for cleaning records, keeping your stylus clean is crucial for maintaining both your records and sound quality.
Step-by-Step Guide to Cleaning Your Vinyl Records
Now that we have our tools ready, let’s walk through the process of cleaning your vinyl records:
Step 1: Preliminary Dust Removal
- Place your record on a clean, flat surface. A dedicated record cleaning mat can provide a safe, static-free surface for cleaning.
- Gently brush the record’s surface with a carbon fiber brush, moving in a circular motion following the grooves. Start from the center and work your way out to the edge.
- This step removes loose dust and static electricity, preparing the record for deeper cleaning. It’s a good practice to do this before and after each play to prevent buildup.

Step 2: Wet Cleaning Preparation
- If using a commercial cleaning solution, dilute it according to the manufacturer’s instructions. Some solutions come ready to use, while others need to be mixed with distilled water.
- For a DIY solution, mix distilled water with a few drops of mild, unscented dish soap. The ratio should be about 1 drop of soap per 1 liter of water. Be cautious with DIY solutions and test on a less valuable record first.
- Never use tap water, as it may contain minerals that can leave residues or even etch the vinyl surface over time.

- ALCOHOL FREE
- QUICK DRYING
- ANTI-STATIC
Step 3: Applying the Cleaning Solution
- Lightly moisten a microfiber cloth with your cleaning solution. The cloth should be damp, not soaking wet.
- Gently wipe the record’s surface in a circular motion, following the grooves. Start from the center and work your way out, being careful not to press too hard.
- Be extremely careful not to get the label wet, as this can cause damage or even separation from the vinyl. You can use a record label protector or simply be very cautious around the label area.
Step 4: Deep Cleaning the Grooves
- For stubborn dirt or particularly dirty records, use a soft-bristled brush designed for record cleaning.
- Apply a small amount of cleaning solution to the brush. Again, it should be damp, not dripping.
- Gently brush along the grooves, being careful not to apply too much pressure. The goal is to let the bristles do the work of dislodging dirt from the grooves.
- Work your way around the entire record, paying extra attention to any visibly dirty areas.

- Clean and protect your vinyl collection — Our vinyl record cleaning kit is the simple and safe way to remove dirt, dust,…
- 8 piece kit contains all vinyl cleaning essentials — Ultimate LP vinyl record cleaner kit includes velvet vinyl cleaner …
- Enjoy pop, click and hiss-free listening — Eliminate static via the dual-row extra-soft bristles of our carbon fiber rec…
Step 5: Rinsing
- Use a clean microfiber cloth dampened with distilled water to remove any remaining cleaning solution.
- Again, work in a circular motion following the grooves, starting from the center and moving outward.
- This step is crucial to ensure no cleaning solution is left behind, which could affect playback or attract more dust.
Step 6: Drying
- Use a clean, dry microfiber cloth to gently pat the record dry. Avoid rubbing, as this can push any remaining moisture or particles back into the grooves.
- Allow the record to air dry completely before playing or storing it. This usually takes about 15-20 minutes, but can vary depending on humidity levels.
- You can use a record cleaning rack to stand the record vertically while it dries, ensuring air circulation on both sides.
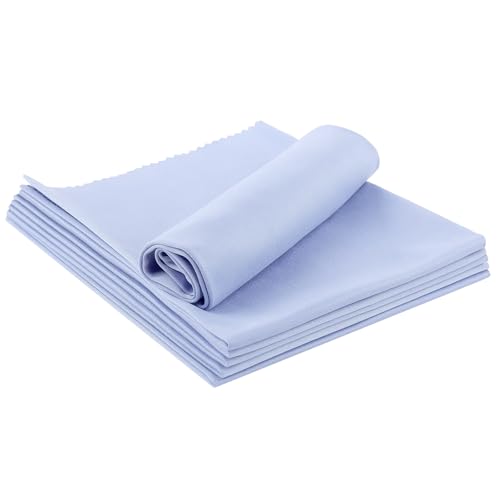
- Big Size! 12 x 12 inches for each cloth. Pack of 6
- Super Soft! Lint free microfiber towel, safely remove the dust and no scratch your beloved LP
- Great record player accessories. The record cleaner cloth is a must for every music enthusiast
Step 7: Final Inspection
- Once dry, examine the record under good lighting. A bright LED light can help you spot any remaining dirt or residue.
- If you notice any remaining dirt or debris, repeat the process focusing on those areas. Sometimes, particularly dirty records may require multiple cleaning sessions.
- Use your carbon fiber brush one last time to remove any loose particles that might have settled during the drying process.
Advanced Cleaning Methods
For collectors with larger collections or those dealing with particularly dirty records, there are more advanced cleaning options available:
Record Cleaning Machines
Record cleaning machines use a combination of wet cleaning and vacuum suction to provide a thorough, deep clean. These machines can be a significant investment but are highly effective for maintaining large collections.
Pros:
- Provides consistent, thorough cleaning
- Saves time when cleaning multiple records
- Minimizes handling of the record surface
- Can effectively clean very dirty or old records
Cons:
- Can be expensive, with prices ranging from a few hundred to several thousand dollars
- Requires storage space
- May be overkill for casual listeners or those with small collections
- Some models can be noisy during operation

- Effortless & Quite Dual-Sided Deep Cleaning: Clean both sides of your vinyl records simultaneously with ease. The Spin-C…
- Easy-to-Clean Basin with Stability-Enhanced Feet: The redesigned vinyl cleaning basin is simple to clean and the new fee…
- Proprietary Alcohol-Free Cleaning Solution: Deluxe vinly record cleaning kit includes (2) bottles of specially formulate…
Ultrasonic Cleaning
Ultrasonic cleaning is the most advanced method available for vinyl record cleaning. It uses high-frequency sound waves to create microscopic bubbles that gently remove dirt and contaminants from the record grooves.
Pros:
- Extremely thorough cleaning, reaching deep into the grooves
- Can restore severely dirty or damaged records
- Minimal risk of damaging the record surface
- Can improve the sound of records that have been unresponsive to other cleaning methods
Cons:
- Very expensive, with machines often costing thousands of dollars
- Requires specialized equipment and knowledge to use effectively
- Time-consuming process, often taking 20-30 minutes per record
- May require additional steps like pre-cleaning or post-cleaning treatments
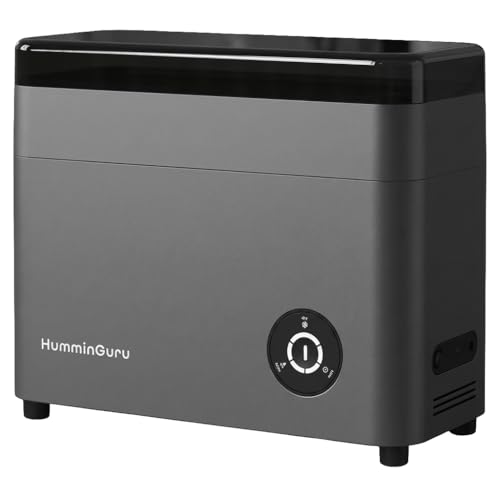
- A professional ultrasonic record cleaning machine, not only brings your dirty records back to life but also designed in …
- HumminGuru record cleaner applied a duo 40 kHz ultrasonic system for vinyl cleaning. With 40 kHz, it is powerful to clea…
- Since HumminGuru vinyl records cleaner is fast and easy. In Auto Clean & Dry mode, You can listen to your record right a…
Best Practices for Vinyl Care
Cleaning is just one aspect of proper vinyl care. Here are some additional tips to keep your records in top condition:
- Handle with Care: Always hold records by the edges and the label area, avoiding contact with the playing surface. Your fingerprints can leave oils that attract dust and affect playback.
- Store Properly: Keep records vertically in high-quality inner sleeves and outer jackets. Avoid stacking records horizontally, as this can cause warping and excess pressure on the grooves.
- Control Environment: Store your records in a cool, dry place away from direct sunlight and heat sources. Aim for a consistent temperature around 65-70°F (18-21°C) with humidity between 45-50%.
- Use Clean Equipment: Regularly clean your turntable, stylus, and other audio equipment to prevent transferring dirt back to your clean records. A dirty stylus can undo all your careful cleaning efforts.
- Replace Inner Sleeves: Consider replacing paper inner sleeves with anti-static, archival-quality sleeves to reduce static buildup and dust accumulation. These sleeves also provide better protection against scratches.
- Upgrade Your Outer Sleeves: Use high-quality, archival-grade outer sleeves to protect your album covers from wear, tear, and dust. These sleeves can also help prevent ring wear on your covers.
- Be Mindful of Playback: Ensure your turntable is properly set up with correct tracking force and anti-skate settings. Improper setup can cause unnecessary wear on your records.
- Use a Carbon Fiber Brush Regularly: Make it a habit to use your carbon fiber brush before and after each play. This simple step can significantly reduce dust buildup over time.
- Invest in a Good Turntable: A quality turntable with a well-aligned cartridge and appropriate tracking force will be gentler on your records, reducing wear over time.
- Be Cautious with Old or Valuable Records: For rare or particularly valuable records, consider having them professionally cleaned or use extra caution when cleaning them yourself.
Cleaning Frequency
How often should you clean your vinyl records? Here’s a general guide:
- Before Every Play: Use a carbon fiber brush to remove surface dust. This quick step takes only seconds but can significantly improve playback and reduce long-term buildup.
- Every 5-10 Plays: Perform a light wet cleaning. This helps prevent the accumulation of dirt and oils that can be pushed deeper into the grooves with repeated plays.
- As Needed: Deep clean records that show signs of significant dirt or sound quality issues. If you notice a decline in sound quality or visible contamination, it’s time for a thorough cleaning.
- New Records: Give new records a light cleaning before their first play to remove any manufacturing residue or dust accumulated during shipping and handling.
- After Handling: If a record has been handled extensively (e.g., at a party or during a DJ set), clean it before storing to remove any oils or dirt transferred during handling.
Common Mistakes to Avoid
When cleaning your vinyl records, be sure to avoid these common pitfalls:
- Using Household Cleaners: Avoid using any cleaning products not specifically designed for vinyl records. Many household cleaners contain harsh chemicals that can damage the vinyl surface or leave residues that affect playback.
- Applying Too Much Pressure: Gentle cleaning is key. Pressing too hard can damage the delicate grooves of your records. Let the cleaning solution and gentle motion do the work, not force.
- Neglecting the Stylus: A dirty stylus can transfer grime back onto your clean records. Clean your stylus regularly with a specialized stylus brush or cleaning solution. Be extremely gentle, as styli are delicate and expensive to replace.
- Ignoring Static: Static electricity attracts dust to your records. Use anti-static tools and sleeves to minimize this issue. An anti-static gun can be particularly effective in reducing static buildup.
- Playing Wet Records: Always ensure your records are completely dry before playing. Moisture can damage both the record and your turntable’s components, potentially causing electrical issues or warping.
- Using Circular Motions When Dry Cleaning: When using a carbon fiber brush for dry cleaning, always brush in line with the grooves, not in a circular motion. Circular motions can potentially push debris deeper into the grooves.
- Cleaning the Label: Avoid getting the record label wet during cleaning. Water can cause the label to separate from the vinyl or become damaged. Use a record label protector or simply be very careful around the label area.
- Using Tap Water: Always use distilled water for cleaning and rinsing. Tap water can contain minerals and impurities that may leave residues on your records.
- Storing Records Horizontally: Always store your records vertically. Horizontal storage can cause warping and put unnecessary pressure on the records at the bottom of the stack.
- Touching the Playing Surface: Avoid touching the playing surface of your records with your bare hands. The oils from your skin can attract dust and affect playback quality.
The Importance of Prevention
While cleaning is essential, preventing your records from getting dirty in the first place is equally important. Here are some preventive measures:
- Use Anti-static Inner Sleeves: These specialized sleeves reduce static buildup and protect your records from dust. They’re worth the investment for long-term protection.
- Keep Your Listening Area Clean: Regularly dust and vacuum the area around your turntable to minimize airborne particles. Consider using an air purifier in your listening room to reduce dust in the air.
- Wash Your Hands: Always handle records with clean, dry hands to avoid transferring oils and dirt. If your hands tend to be oily, consider using cotton gloves when handling records.
- Use a Dust Cover: Keep your turntable covered when not in use to prevent dust accumulation. If your turntable didn’t come with a dust cover, consider purchasing one or making a custom cover.
- Limit Exposure: Return records to their sleeves promptly after playing to minimize their exposure to dust and contaminants. Don’t leave records out on the turntable when not in use.
- Control Humidity: Use a dehumidifier in your storage area if you live in a humid climate. High humidity can promote mold growth on your records and jackets.
- Regular Maintenance: Perform regular maintenance on your turntable, including cleaning the platter, checking the belt (if applicable), and ensuring proper alignment of the cartridge and tonearm.
- Quality Equipment: Invest in a good quality turntable and cartridge. Better equipment is often gentler on your records and can reduce wear over time.
- Proper Technique: Learn and use proper technique when cueing records and lifting the tonearm. Careless handling can cause scratches or unnecessary wear.
- Educate Others: If you share your record collection with family or friends, take the time to educate them on proper handling and care techniques.
Conclusion
Properly cleaning your vinyl records is an essential part of being a responsible record collector. You can decide which option works for you here. Follow these steps and best practices and your records will be in great shape for years to come. Remember, consistency is key – regular gentle cleaning will always yield better results than infrequent heavy cleaning.
Whether you’re a casual listener or an audiophile, taking care of your vinyl is a fun process that adds to your overall listening experience. It improves sound quality and deepens your connection to the music and the format itself. The ritual of cleaning and maintaining your records can become a meditative and enjoyable part of your music listening routine. As you build your collection and hone your cleaning skills you’ll likely develop your own preferences and methods. Don’t be afraid to experiment (carefully) with different cleaning solutions or tools, always remembering your records are delicate.
Remember, each record in your collection is not just a piece of vinyl – it’s a physical embodiment of music, art, and often, personal memories. By taking good care of your records, you’re preserving not just the music, but also the history and emotions associated with each album.So, put on your favorite record, sit back, and enjoy the warm, rich sound of a well-maintained vinyl collection. Let the pops and crackles fade away, replaced by the pure, intended sound of the music. Happy listening, and may your records spin smoothly for years to come!


